How to Measure a Room
So, you’re looking to update your design? We know you’re eager to dive in and get to the fun part, but a little preparation and planning at the start can save you some major headaches throughout the process. Taking accurate measurements not only ensures everything will fit but can help you and your designer explore options and test a variety of layouts.
But how exactly do you measure a room in preparation for your new design? We’ve included a comprehensive guide to help you through the process to make it as pain-free as possible.
What You’ll Need:
Tape measure
Pencil or pen
Pad of paper (graph paper is ideal)
Tip: It’s always a good idea to have an extra set of hands while taking measurements for better accuracy.
First: Measure all entries
It may seem obvious, but forgetting to consider the path you will have to take through your home can become a real disaster when delivering and moving furniture. Before starting, save yourself any unnecessary frustration and take measurements of all the entryways, passages, stairways, and doors your furniture will need to move through.
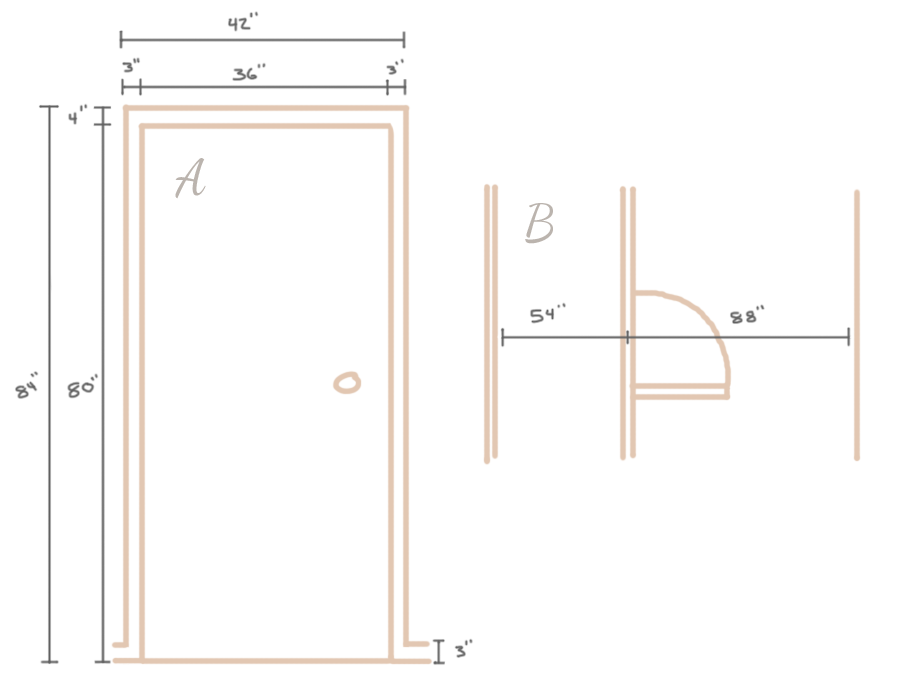
For doors, measure the height and width from the inside of the frame (Diagram A). It’s also a good idea to measure the distance from the far walls (Diagram B).
Make a note of which way the door swings, how far it can swing open, and whether removing the door is an option.
Second: Draw a floor plan of your room
No need to worry about your drawing being to scale. This rough floor plan will serve as a reference where you can jot down the measurements you’ll be taking. While it’s possible to simply make a list of these measurements, creating a visual of the room makes communicating your vision much easier.
Start with the general shape of the room and make note of major architectural features like windows, doors, and fireplaces. Use your best judgment with relative locations. Again, don’t be frustrated with your drawing if it isn’t pretty. We’ll later create a more accurate drawing based on your measurements.
Third: Measure the room
Record your measurements right on your sketch (Diagram C). Start with the walls as you move around the room, measuring along the baseboards. It’s best to move any furniture that might obstruct taking an accurate measurement.
Move on to measuring permanent architectural features like doorways, windows, radiators, fireplaces, etc.
Don’t panic if you accidentally miss one. We’ll let you know if we need any additional details from your room before we begin working on your design.
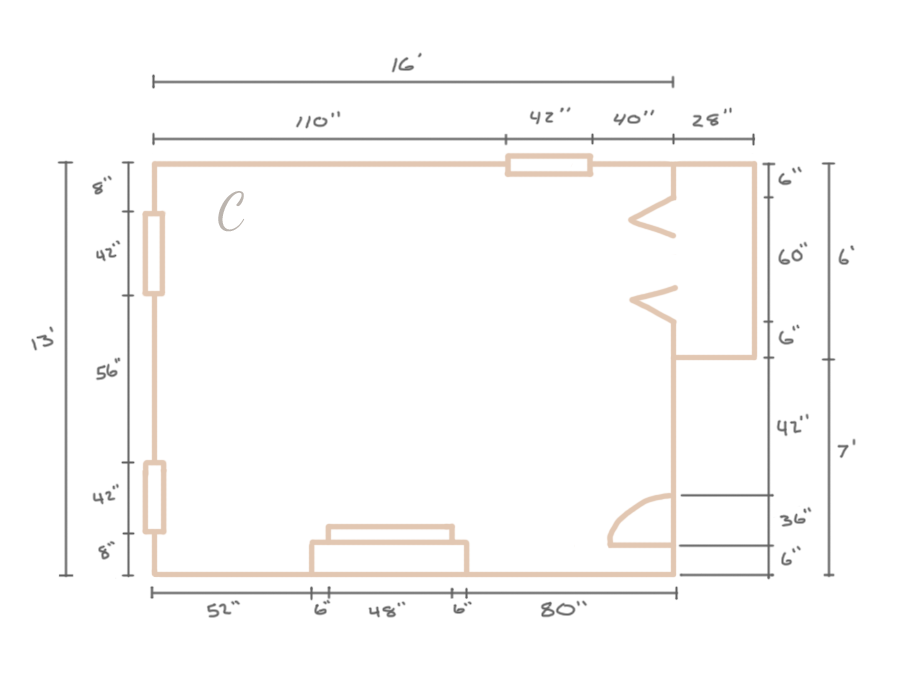
Tip: It might help keep your measurements clear and uncluttered if you create copies of your sketch to record different measurements.
Fourth: Measure the walls
Now that you’ve got the horizontal measurements, it’s time to look up! Record your vertical measurements and heights as you did for the floor plan.
First, make a rough sketch of each wall and, again, include any permanent architectural features like windows, built-in shelving, or doorways.
Measure the vertical height of each feature, including the space above and below.
For windows, along with the height of the window, it’s a good idea to measure the height and width of the trim on each side and the window itself.
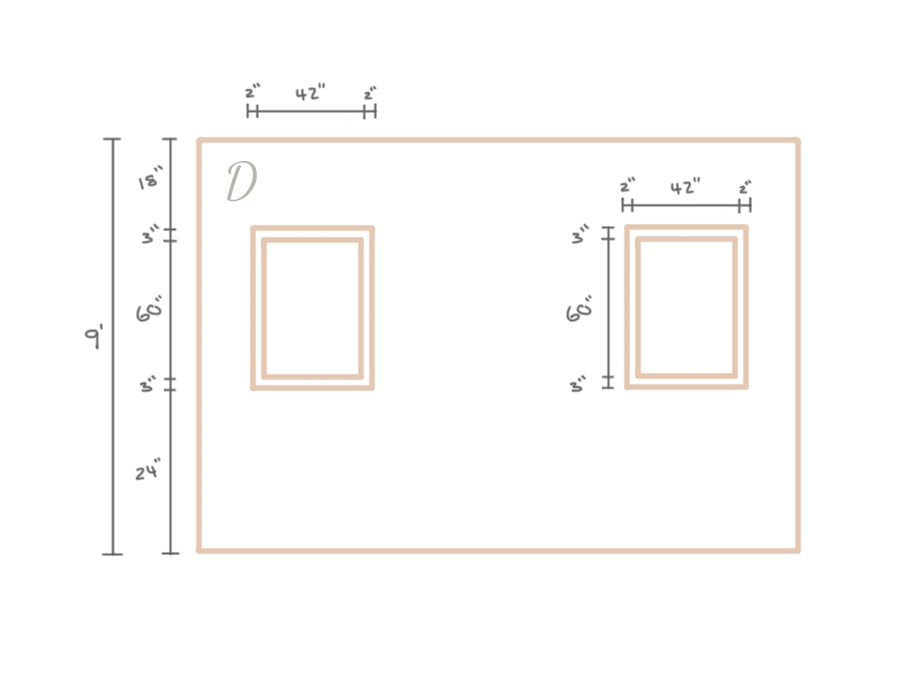
Tip: Not all windows in a room may be the same size! It’s a good idea to measure each window to ensure accuracy.
Fifth: Measure Electrical
You certainly don’t want to forget where any cords need to go. Fortunately, you can add electrical features to our floor plan and elevation sketches easily. Or, if you find you need more space on your drawing, feel free to make another copy for electrical specifically.
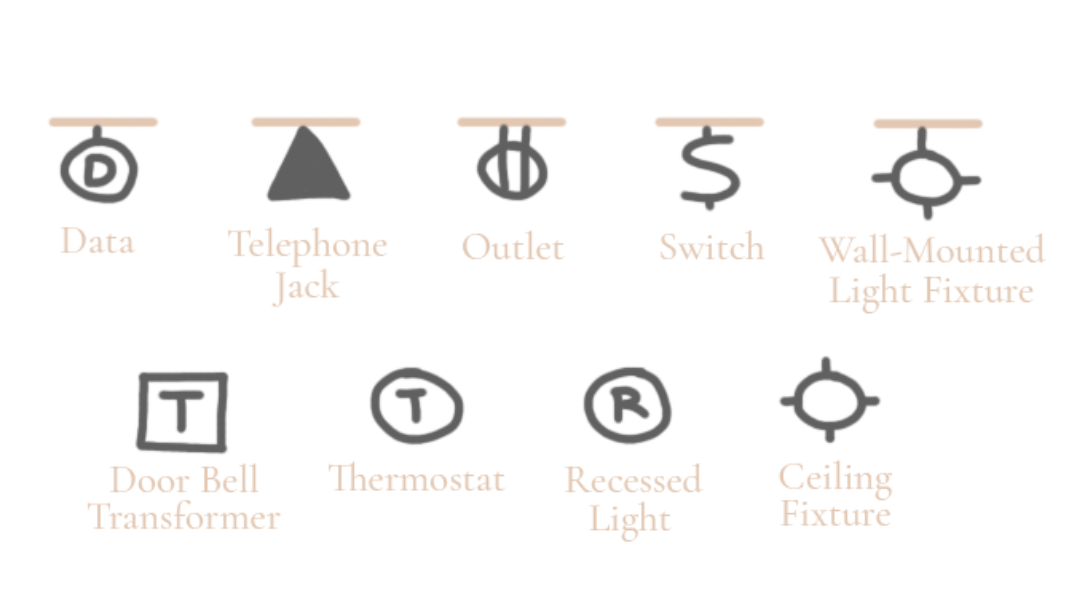
Mark the locations of any electrical features such as outlets, cable hookups, landlines, etc. Then measure the distances from the wall, floor, and ceiling from the center of the feature.
We’ve included some common electrical symbols that you can use. Otherwise, make sure each electrical feature is labeled clearly.
Sixth: Measuring Complex Spaces
You may find a space or feature too complex to add to your floor plan or elevation. Perhaps a built-in shelving unit would be easier to diagram on its own. If that’s the case, go for it! Sometimes the added detail is just what a designer needs to understand the space they’re working with, and clarity is always more desirable than confusion.
Again, you’ll be following the same process as we did for the room at large. Start with a rough sketch of the feature and then measure each dimension and record them in your sketch.
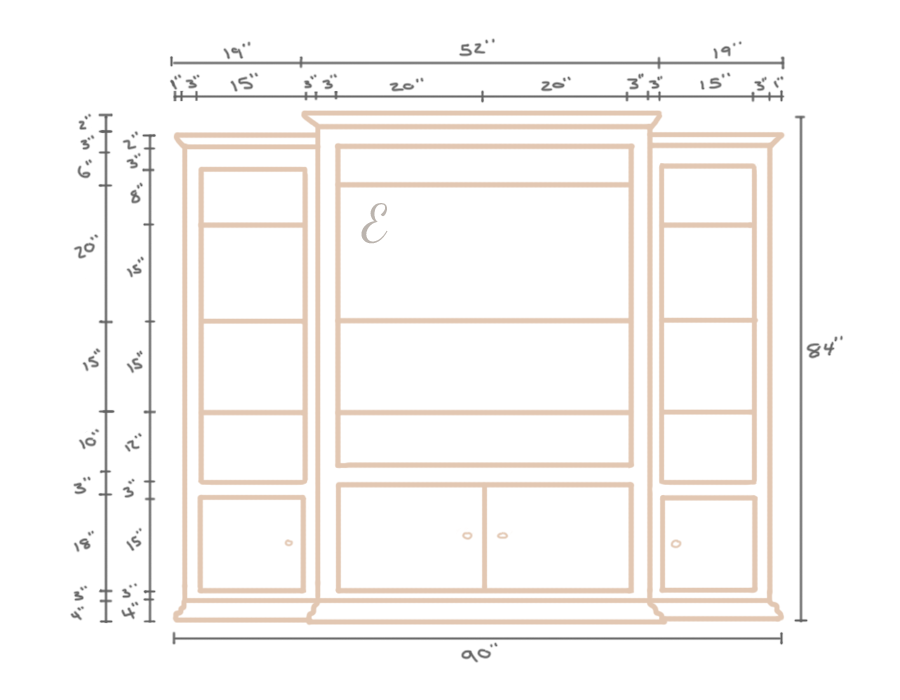
Tip: Remember to indicate where this feature is located on the floor plan or elevation sketches.
That’s it, you’re finished! Share these sketches with your designer, and they should have enough information to build an accurate and detailed model of your room.
Ready to get started?
Let us help you cultivate your ideal home!